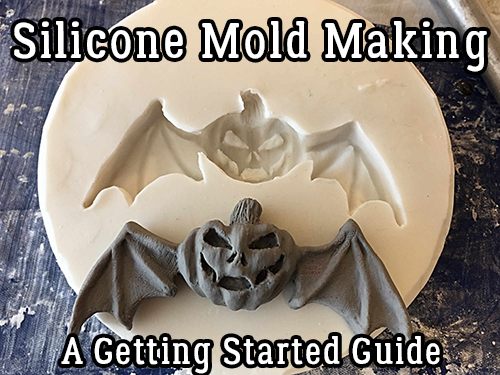
Silicone Mold Making – A Getting Started Guide
Silicone is one of the best materials you can use to make molds and the process is actually quite simple. Being able to make a mold quickly and easily means you can make resin, concrete, clay and metal versions of almost anything.
The possibilities are endless!
There are many ways to make a silicone mold yourself.
A fast and easy way to make a mold out of silicone involves taking casts of anything solid and durable (like a pre-made part you want to copy) and removing it when the silicone is set. And when using silicone, your mold will be ready in about 20 minutes. While you can always buy silicone molds in different shapes, sizes and designs, making a DIY silicone mold lets you make a custom piece not available in the market. Making a silicone mold at home is much cheaper as well. Some of the links on this page are affiliate links and as an Amazon Associate I might earn a tiny amount from qualifying purchases if you end up buying something through one of them.
Now, for me, I do go ahead and buy basic shape style molds as they are very inexpensive (you can check them out here). But for any intricate, custom type molds, I try to do them all myself.
Here is a detailed guide on getting started to making silicone molds at home.
Page Content Navigation
Silicone Mold Making
This easy way of silicone mold making will get you want to make casts of all your valuables and toys. 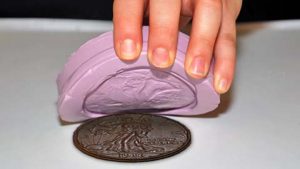
Materials you Need:
100% silicone
Water
Bowl
Blue dish-soap
Caulking gun – you can see an example here
Knife or scissors
The item you want to make the mold of
Masking tape
Making the Catalyzing Solution
Take a bowl and mix soap water in a high concentration and water to make a catalytic bath for the silicone. The dish soap contains glycerine that accelerates the process of curing for your pure silicone used for mold making. By using a colored dish soap you can see exactly how much you are adding. A good starting point is about 5 ounces of soap in 70 ounces water.
Catalyzing the Silicone
Cut the tip of the silicone caulk tube, use the long pin on the end of the caulking gun to puncture the inside of the tube of silicone and then put the tube into the caulking gun. Then squirt out enough silicone to cover the object for molding into the catalyzing bath. You can easily use an entire tube for one mold.
Preparing Your Silicone Moulds
Keep your hand submerged in the soap bath and gently bring the silicone together to form a ball shape. Then massage it slowly, fold it, stretch it and knead it like you knead a dough. As it starts becoming less malleable and stiffens, you can put your object into the silicone. If you would like more information on this process, please see our article on Resin Mold Making – The Complete Guide To Silicone Mold For Resin
Making the Mold Water Tight
To make sure that your mold is water tight, you can add a thick layer of silicone to the object’s surface area. You can cover the object by a ½” layer of silicone all over. Also, make sure you leave a considerable amount of your object uncovered. You should be able to pull out the figure out of the mold at this stage without any part getting caught. If not, it becomes quite difficult once the mold is set.
Letting it Cure
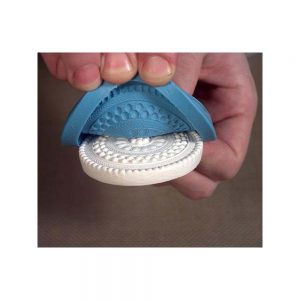
Your mold can take about an hour to cure fully before you can use it for casting. Let the object remain in the mold while the silicone cures. Check that the mold is no longer sticky to touch and feels rigid before removing your part from the positive mold you’ve just created.
Use the Mold
To use the mold you can fillill the mold with clay, pull it out and let it dry. You can also use other materials like resin with the mold but it needs to cure and harden to get the cast.
Pouring Silicone
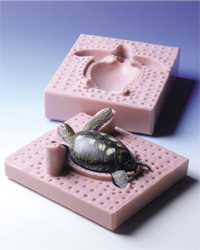
Silicone RTV mold-making rubber is one of the best materials to make detailed molds at home. RTV or Room Temperature Vulcanizing means you need not put the materials into the oven to cure once you’ve mixed them up. One of the ways to make molds using silicone is the ‘block mold’. It involves pouring silicone into a box containing your prototype. Then you let it cure into a solid rubber block before removing it from the box. Once you’ve done that, you just remove the object from the mold, pour the casting material into the mold and let it cure and harden to get your part. Detailed cast making is really straightforward and flawless with silicone rubber if it is mixed properly and poured. You can see silicone rtv here and other silicone rubber for molds here.
Silicone rubber generally does not stick to anything and this allows you to cast parts without the need to add any mold-release agents that fill or obscure smaller details.
To build the block, you can take a scrap of cardboard big enough to have 1/2” of material around the object. Use hot glue to make sure all the seams are properly sealed inside and out to prevent the silicone from leaking. Check that the prototype is free of any flaws like fingerprints. For a more permanent mold, you could always use plywood.
Put some glue on the bottom of the object and center it in the box. This avoids shifting of the object when silicone is poured. Place it on a piece of clay to give the casting some additional material which can be cut off. Mix the silicone according to the manufacturer’s instructions. The biggest challenge in pouring silicone is air bubbles. They can tear open and cause the mold to fail. Bubbles at the surface can become lumps of casting material in the final part. To minimize air bubbles getting captured against the surface, pour the rubber into one corner of the mold so that it fills and flows across the surface. Lift the container while pouring to draw it into a thin strand helping rupture the air bubbles created during the mixing process. It is advisable to use a silicone type with longer cure time to give the bubbles some time to float on the surface.
You can also try using a little bit of heat from a hairdryer, or a heat gun to make the bubbles release. Just go easy and make sure you don’t burn the silicone with the heat.
Once the silicone rubber has cured, tear the cardboard box around the part and peel the rubber off the object. The mold is now ready to cast the parts in different materials.
Easy Mold Silicone Rubber
You can both pour it and brush it on, and it has about an hour of working time before it sets up.
This product is nice as it’s specifically formulated to produce casts and can reproduce some fairly fine details in the parts that you’re working on casting. The other thing that is nice is that there is no form agent required as most parts will release from the mold you make fairly easily. It’s also a food grade material, making it safe to use and handle without having to be worried about different toxins or chemicals that might be bad for you.
One other thing to keep in mind is that if you’re using silicone to cast parts, is that other silicone products will stick and adhere to silicone. So you don’t want to try and cast silicone parts in a silicone mold or wear silicone gloves when you’re casting your parts. Just as a quick tip to make your life a little easier.
Leave a Reply