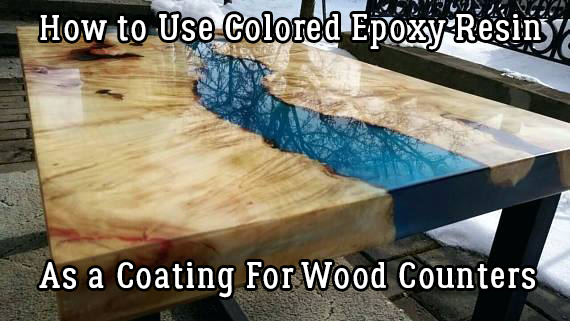
How to Use Colored Epoxy Resin As a Coating For Wood Counters
You might have come across some stunning table tops resembling galaxies, glow in the dark bar tops or waterfall wood tables while looking for something on Pinterest or Google and wonder how to color resin.
And these products often cost thousands of dollars.
But the good news is that with a little effort and creativity, you can make your own. In fact, if you’re looking for an in-depth tutorial check out our DIY Epoxy Countertops – The Perfect Solution for Resin Worktops article.
Here’s a quick guide and a DIY method with coloured epoxy resin to help you get starting making projects like this make for a fraction of cost!

If you have a table in your home, restaurant or office and feel like creating a masterpiece or decor item out of it, here is a comprehensive guide to using coloured epoxy resin to coat wood counters to help you create a masterpiece yourself. Some of the links on this page are affiliate links and as an Amazon Associate I might earn a tiny amount from qualifying purchases if you end up buying something through one of them.
Page Content Navigation
A Few Things to Consider When Using An Epoxy Coating For Wood
You can choose any brand of epoxy to apply colored coating to your wood counter. However, the best suited are the drying clear epoxies as they can get the resin tint better true to color. Epoxy resins tend to leave a yellowish tint when set and colors can shift in shade when mixed with epoxy. Therefore, it is a good idea to start adding color to the epoxy in a small container. Once you are content with the color created, you can proceed to mix them in larger quantities.
How to Use Colored Epoxy Resin
 You can add a wide variety of materials to add color to your epoxy resin. Each of these materials has its own advantages and limitations you should consider before selecting one.
Acrylic
Acrylic paint and acrylic ink can be used to add color to epoxy resin. Acrylic comes in a range of hues. However, it is not the ideal solution and people who work with epoxy resin would want to preserve the glossiness of the resin. Acrylic is a plastic and tends to take away some of the shine of the resin. You can see the different acrylic ink options here.
Resin Tint (A Key On How to Color Resin)
A resin colorant that mixes seamlessly, Resin Tint is compatible with most epoxy resins and needs resin to bind. It is just like food coloring and cannot be used without mixing into epoxy resin. Resin Tint is non-flammable and non-toxic and preserves the properties and glossiness of the resin when added to it. You can check out different resin tints here.
Alcohol Ink
This colorant offers rich saturation and is suitable for most epoxy resin applications. It is a solvent and mixes well with the epoxy resin. Alcohol inks can be used to do much more than simply adding color to the resin. Using alcohol inks allows creating unique patterns within the epoxy resin and you can see some different options available here.
Applying Colored Epoxy Coating
The process of applying two-part colored epoxy is the same as the process of curing regular epoxy. The epoxy resin and hardener are mixed in 1:1 ratio or according to the product instructions. After mixing the two main ingredients, it is the time to add the colorant. The colored pigment, whatever you choose, should not be more than 6% by weight of the mixture. You can adjust the amount of pigment added into the resin depending on the level of transparency you want to achieve.
As powdered pigments are likely to leave very little specks in the finished resin, watercolor paint, chalk, eyeshadow or such loose pigment should be chosen for such a look. If you desire more consistent finish, you can go with liquid pigments. One of the most preferred colorants is alcohol ink which is an expensive liquid pigment highly popular for epoxy resin artworks. It has an excellent opacity and its ability to retain transparency when placed in front of light. This is your best pick for creating wooden counter top masterpieces. Transparent dyes also work but they are quite pricey. You can also check out resin pigment colors available at stores. These colors can be mixed with epoxy resin and work well for your next coating project. You can even find phosphorescent pigments that glow in the dark and help you take your DIY project to the next level.
Prepare the wood counter surface by using a sander to remove any imperfections. Remove dust off the surface using a damp cloth. To prevent any dripping while working with epoxy, use wooden piece or painters tape around the edge of the top. To apply the first coat, pour a small amount of the mixture in the center and coat the surface area lightly and thoroughly. This coat seals the surface initially. Air bubbles are likely to form but if done properly, they will leave the surface before the epoxy hardens. Let the first coat dry completely for few hours before applying other layers. Secondary coats can be thicker and you need not worry about air bubbles.
You can get a wide variety of great colorants inexpensively here.
Get Creative When You’re Learning to How to Color Resin
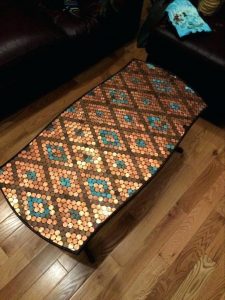
If you want to use creative ideas to decorate your wood counter, you can add small items or photographs before applying the first layer of colored epoxy. You can even plan out the designs to re-make your tables and counter tops. You can cut grooves and shapes and fill them with different colored epoxy resins to create attractive patterns as well. This requires some advanced planning. You can print your favorite pictures, select some wooden letters, get dried flowers and leaves or anything else you may wish to add. Then, stick them to the wooden surface with the help of glue. Once the glue and sealant dry, you can add epoxy resin in thin layer followed by thick layers to finish the top.
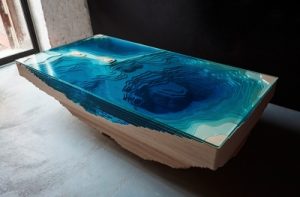
It is possible to create a stunning waterfall table by filling the cracks and dents in the table with pigmented epoxy. You can overfill the grooves and once they dry, sand the wooden top and finish it with a sealing topcoat to get a glossy finish.
Using colored epoxy resin to coat the wood counters is quite interesting and attractive for master woodworkers to art makers creating DIY projects at home. Though such projects look complicated, the actual process of using pigmented epoxy resin is quite simple and can be mastered with practice. You can actually create some really stunning, valuable art pieces out of your wood counters using this method.
For a few other creative ideas, you can check out our article DIY Live Edge Table Using Bar Top Resin.
Self Leveling Epoxy
 Most quality epoxy products tend to do a fairly good job of leveling themselves out, but in order to get the best results you should start by making sure the counters that you are making along with any forms you might be using are perfectly level and ready to go before you start pouring.
Beyond that, a little bit of heat will help the mix self level pretty well.
You can add heat by either turning up the heat in the room you’re currently making the table or counter top in or you can add a little bit of heat using either a hair dryer, a heat gun or a propane torch. If you do this, just make sure that you don’t burn your epoxy!
A nice benefit of adding a little heat is that it can help release any air bubbles trapped in your epoxy.
Leave a Reply