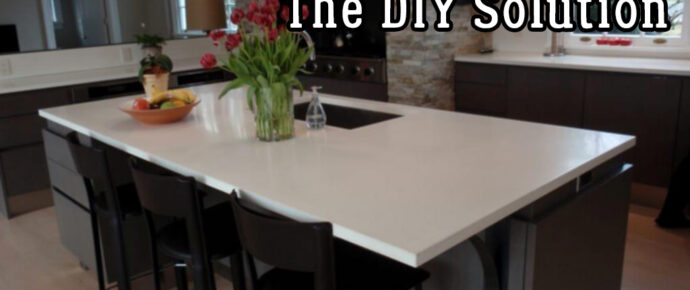
GFRC Countertops – The DIY Solution
When it comes to GFRC Concrete Countertops or any other DIY projects, it’s important to take a step back and really evaluate what you are hoping to achieve.
Are you trying to save money? Are you trying to create something amazing? Are you wanting to just improve something you’ve already done or develop your skill level through a bit of practice?
In my experience, it’s important to know exactly what you’re trying to accomplish by doing this as it will dictate how the project will turn out.
For example, if you’re trying to go the DIY route to save a few bucks then you have to know the cost of either having glass fiber reinforced concrete countertops custom made, or you need to investigate the cost of having them done in another material like granite, marble, quarts, laminate and so on in order to get an idea of whether or not it’s worth you investing your time and money into making them yourself.
If you have the tools needed, that will help reduce the cost as well.
So you need to take inventory a bit and see whether it’s really worth it or not.
And if you figure it is, then let’s get to it!
Some of the links on this page are affiliate links and as an Amazon Associate I earn a tiny amount from qualifying purchases. It’s literally a few cents.
Page Content Navigation
Glass Reinforced Concrete
First, the basics. This is a type of reinforced concrete that uses alkaline resistant fiberglass fibers mixed into portland cement, sand, along with an admix. They may add silica fume, hydration stabilizer and different coloring as well before the final product is sealed completely.
This mix produces a much stronger product all around. The compressive strength is much higher than standard concrete, but the flexibility and tensile strength of gfrc concrete is much higher so it can actually *bend* a bit without breaking.
And with this higher level of strength, you’re able to make your slab sizes much smaller – in some cases as small as 1/4″ thick, which greatly reduces the weight of the finished product.
Fiberglass Fibers for Concrete? Really?
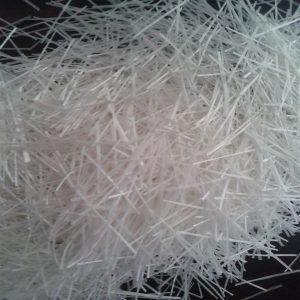 Oh ya. It’s the special admix and fiberglass fibers that give this type of cement its incredible strength. It’s these fiberglass fibers that are able to be woven together in the cement mix that provide more structural support than standard aggregate or even rebar as it provides more surface area to bond to while going in different directions throughout the mix, providing a more even distribution of support throughout the final product.
What You Will Need
Here are the tools you will need if you don’t have them already.
- A mixing drill like this one
- 1/2″ Fiberglass Fibers
- A screw gun
- A fondant tool to help radius the corners of your form when you put in the silicone
- Black Silicone
- Mold Release to help the concrete come away from the form nicely
- A saw
- A drywall hopper gun
- An air compressor
- Admix
- Portland Cement
- Concrete trowels
- Concrete Sealer
- 1/2″ thick melamine board (the particle board with the smooth white plasticky finish on it)
- Screws
- High Density Foam/Rigid Insulation for your sink knock outs
- Screws
As I mentioned earlier, if you have some of these tools already it will make the build a lot less expensive. Otherwise you will need to see whether or not it’s worth it for you to do it. Unless you’re just wanting to buy tools for future use as well. And I don’t blame you for that 🙂 Once you have a basic assortment of tools it will open up a whole new world of opportunities for you when it comes to the different DIY projects you can tackle. So it’s almost like you’re investing in your future and future money-savings.
GFRC Concrete Countertops
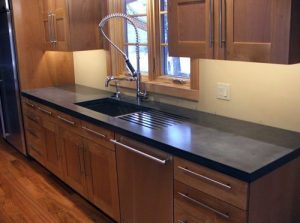
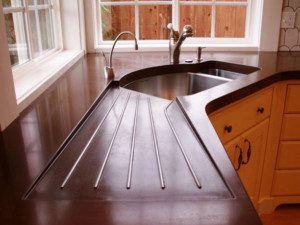 The nice thing about using glass reinforced concrete is that you can do almost anything with it.
You can shape it into almost any shape you want – so long as you can build a form for it.
In fact, you can even make round shapes!
You can add different media to the mix like stones or pebbles, glass, even led lights!
So with this material, the only real limitation is your imagination when it comes to what you can make.

Concrete Countertop Forms
I’ll leave instructions on mixing your countertop mix to the company you buy your admix from. As this is such a specific thing, you need to follow the manufacturer’s instructions. And as it can vary from manufacturer to manufacturer, I’ll leave that up to you.
That being said, you will be making 2 different mixtures:
1) A light face coat that you will spray on first that doesn’t have any fiberglass in it. It will be around 1/8″ thick.
2) A backer coat that you will pack in afterwards that contains the fiberglass concrete mix. This will be the remainder of the finished thickness of your countertop slab – so a minimum of 1/4″ but probably closer to at least 3/4″.
Making the Forms
So the first step is to make your forms.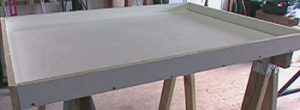
To do this, just measure the length and width of the countertop you are wanting to make by measuring the top of the cabinets and then add enough for an overhang. These measurements will be the inside measurements of your forms.
Then rip your melamine board to that size.
Now you need to rip strips of melamine to the overall height you want to make your countertops.
So if you want a countertop 1″ high, you need to rip strips of melamine 1″ wide.
For me, when pouring concrete I’ve always found it easier to build my forms to the finished size and pour up to the top rather than trying to snap a line and pour up to it. I’ve always found when I’ve snapped a line and tried to pour up to it that the lines get smudged or you end up pouring over top of it.
Then just screw your strips to the base you cut to size.
HELPFUL TIP: Predrill your holes for the screws that go into the melamine or it will split and bulge. If you don’t have a pocket hole jig, I would highly recommend you get one like this one here. I find the little magnet on the jig to be a lot nicer than trying to use the Kreg pocket hole jig.
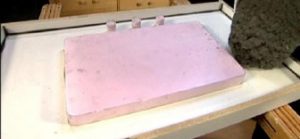
Now you’ve got your basic form complete, you need to cut your high density foam or rigid insulation to size for your sink opening and for the knockouts for the taps.
Sinks often come with a cutout you can trace for your cut, but failing that you can just measure the inside of your sink. I always make the hole a little smaller than the sink opening (maybe 1/4″) so the countertop comes past the edge of the sink a little. I just think it looks nicer.
Then do the same thing with the holes for your faucets. They generally come with instructions on the size of the hole to make for them, depending on how you’re going to mount them.
Once you’ve cut your pieces to size, you should fill the edges with bondo or drywall mud and then sand it completely smooth once dry.
Any texture or imperfections that are in the forms will be replicated by the concrete – so take your time now and make everything as nice as possible as it will save you a lot of time later when it comes to grinding the concrete.
Once you’ve done this, you can use the black silicone to fix your sink and faucet cut outs in place, and then caulk all the joints of the form with the black silicone. Go around all of the edges of the melamine, and also go around the sink and faucet cut outs.
Once you’ve done that, run the fondant tool around and along these joints with the silicone in order to give it a nice radius.
Use a larger fondant tool to get a bigger radius, or a smaller fondant tool for a smaller radius.
Once you’ve done that, let the silicone dry completely. Once it’s dry, remove any silicone outside of the corners you gave a radius to. You only want to leave the nice straight section of the radius behind – the rest that oozed out each side as you ran the fondant tool around it needs to go.
Once you’ve got this done, make sure you clean the forms before you pour. Some people use a form release agent on them to help with the removal of the countertops once they’re done.
GFRC Sprayer – Where the Magic Happens
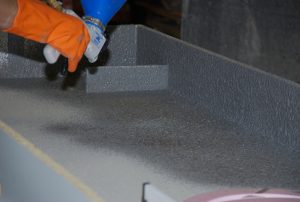 To start, you’ll need to mix up your face coat and spray it using a GFRC spray gun. The majority of DIY’ers just go with an inexpensive drywall sprayer like this one.
Your facecoat mix should flow easily from your hopper and come out in a bit of a wet splatter pattern.
Once you’ve got your mix correct, you can spray the inside of the forms evenly up to about 1/8″ thick. Once you’ve got that done, you want to use a brush to remove any air bubbles and to work the concrete into the corners. Then you let it set up for about 30-60 minutes.
You want the facecoat to firm up a little, but still have a little moisture to allow the 2 sections to bond together.
Once you’ve got the facecoat ready, you can mix the backercoat with the glass fibers.
Remember – the facecoat is really just a skim coat that will give the appearance of the countertops and it doesn’t have any fibers in it.
The backer coat has the fibers in it. 
Depending on the consistency of your backer mix, you will either hand pack the mixture into your forms or you will pour it into the form.
You want to pour the backer in layers about 1/4″ thick as you go and allow the air bubbles to release.
Once you’re done you can cover the entire form in plastic and wait 24-48 hours and then remove the countertops from the forms.
After that, you can either fill or sand out any imperfections on the top of your countertops before applying the sealer.
And then you’re done!
If you’re looking for more of a cast in place option, you should have a read of our post on Sakrete 5000 vs Quikrete 5000
Leave a Reply