Pouring Epoxy Resin – Clear Polyester Casting Resin Tutorial
There are a few tricks to pouring epoxy resin as it’s a two-part system that consists of the base resin and the hardener. They are inert compounds in themselves but when mixed together, cure and harden by a chemical reaction. Polyester resins cure to a very hard finish that leads to a shiny, clear surface. Gravity can make it somewhat difficult to get the resin stay on the surface after you have poured it in place and if there is no raised edge around. In this article, we discuss some important tips on how to pour and spread the epoxy resin for a thick, glossy, leveled, professional looking finish.
The process is a little different than making resin countertops like in our tutorial here.
Page Content Navigation
Clear Casting Resin Or How to Pour Epoxy Resin

If you want to coat an entire piece, begin by pouring the resin in the center of the work. Using a spreader, guide the resin wherever you want it to spread. The resin naturally levels to a thickness but it is possible to use an object like spreaders to spread it around into place. To embellish particular areas of a piece, use a disposable foam brush.
This resin works particularly nicely for any craft related projects.
Embedding Objects in Resin – Dealing with the Edges
There are many ways to deal with edges while pouring an epoxy resin. The most popular way is to tape the underside of the piece, allowing the resin to drip over the sides and spreading it smoothly using a gloved finger or brush.
Some people like to let the resin sit domed on the top of their piece. To do this, you nudge the resin to the edge without crossing the sides.
Here is a tutorial on using homemade technique of masking tape to keep the resin in place until it hardens.
- Place a newspaper or drop cloth on the work surface and put the piece on the cloth. Wipe it with a damp cloth and let it dry properly.
- Use a painter’s tape or masking tape to create a barrier around the edges of the piece if it does not have a raised rim of its own. Make sure that the tape sticks up at least half an inch above the surface to create a rim around the entire piece.
- Next, mix a little amount of epoxy resin and hardener in a bucket with the help of a stir stick until a thin coating is created.
- Pour a thin layer of the mixture on the top of the piece, pouring slowly on the center and fill any flaws and indents within the surface using a foam brush. Continue pouring the resin until the entire piece is coated. You can blow any air bubbles arising with a drinking straw. Let the resin dry completely before removing the tape from the edges.
- Apply more coats of resin as required with sufficient curing time between them and use the fresh rim of masking tape every time. Sand the edges of the surface with a sandpaper near the final coat. Pour the final coat without the tape, allowing the resin to reach the edges naturally. Guide the resin around the sides gently using a foam brush. Allow the piece to cure and harden completely as per the manufacturer’s directions.
Advantages of Clear Polyester Casting Resins

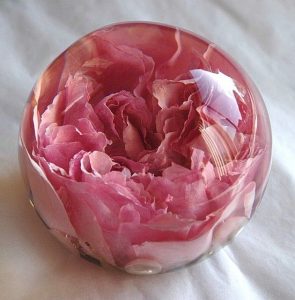
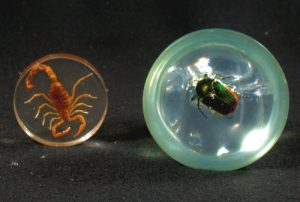
Clear Polyester Casting Resin is an affordable alternative to expensive clear polyurethane casting resins. It features low viscosity that makes it ideal for creating fine surface detail while casting sculptures and ensures outstanding wet-outs when embedding objects in clear resin to make objects like paperweights. It has a very low reactivity which means you can cast quite thick sections at once without any discoloration or distortion. Natural UV stability of polyester ensures that finished parts do not discolor or fade even on prolonged exposure to sunlight, making it perfect for outdoor pieces.
Polyester casting resin is less sensitive to moisture and this makes it possible to achieve better results with specific types of embedments which have a natural high moisture content such as organic matter.
A Mini Clear Polyester Casting Resin Tutorial
Epoxy resin casting is quite simple. The only chance of going wrong is when you use too much of one component and not enough of the other, leading to a casting which is either not fully set or too brittle. Make sure you check the ratio twice or thrice and you will be good.
- First, collect your supplies for casting. You will need a mixing cup with measurements on its sides, resin of your choice, a mold, colorant and popsicle sticks to mix.
- Check the mixing instructions of your resin and follow them. Most resins can be used in 1:1 ratio by volume.
- Mix the two parts thoroughly for 1 to 2 minutes or until combined properly.
- Add your glitter or colorant and mix it in properly.
- Pour the resin into the mold.
- Wait for your resin to cure and you are done.
That’s about it – you are now ready to perform your first resin casting.
One thing of note is that when pouring, you might trap air bubbles in the mold which can add a neat artistic element to it. But if you want to remove it, you can add a little heat with a hairdryer or heat gun to remove them. Just do it carefully – you don’t want to burn your resin!
For a few more tips on this subject, be sure to read our article Resin Mold Making – The Complete Guide to Silicone Mold for Resin


Leave a Reply