DIY Bathroom Vanity Plans – How to Save Yourself Thousands
Is it time to update your bathroom – starting with some new DIY bathroom vanity plans?
Don’t want to spend thousands on buying one?
If so, you’re in the right spot – I’ve got a great DIY vanity plan so you can make a cheap diy vanity. Cheap – but it still looks great.
If you haven’t already seen our post on DIY Storage Cabinet – A Simple Cupboard Design, you need to check it out as it will give you all the step by step help in order to build your cabinet boxes and the cupboard under the sink.
Page Content Navigation
This post will build on that article, highlighting a few of the differences between making cupboards and drawer units.
DIY Bathroom Vanity Plans – Let’s Get To It!
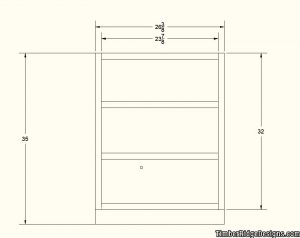
Once you’ve built the cabinet boxes, you will have to layout your drawers in order to determine your shelf spacing. This layout is where you divide up the space available for each of your drawers. You can make them all the same height, or you can have a bigger drawer on the bottom. It’s totally up to you. And that’s the beauty of building your own vanity.
So you can easily modify the DIY bathroom vanity plans found here so you’ll have a completely custom solution.
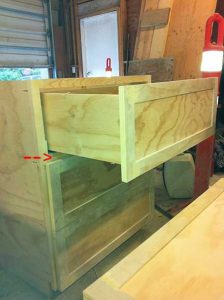
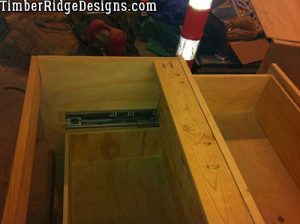
Once I figured out the size I wanted for the drawers, I ripped some 1×4 down to 1.25″ wide and installed them on the face frame to divide up the space (as you can see in the image below).
These 1.25″ pieces will provide a resting place where you can install your drawer slides, but they also cover the space between your drawers.
You could mount your drawer slides and drawers in the cabinet base you’ve built without them, but you’d have a black space between each drawer if you didn’t have these installed.
This blank space would be where the red arrow is in the picture below.
Once you’ve got this together, you’re ready to build your drawers and install your drawer slides.
But before you get going too far, you need to know that when buying drawer slides, your drawer size is limited by the size of the slides you buy. They come in sizes like 18″, 21″ and so on.
So you need to choose a length that is closest to the inside opening of your cabinet box without going over.
If the inside measurement of your cabinet box is 19.5″ then you would – for example – choose 18″ long slides.
TIP: Once you’ve determined what your inside measurement (or the depth) of your vanity will be, order your drawer slides. Then once the slides have arrived, you can build the drawers to suit the slides.
Now, for all my drawers, I used Blum Full Extension Drawer Slides like these here.
I went with the full extension, well, because you get full drawer extension 🙂 So, when you pull the drawer out the entire storage space of the drawer is accessible from the top.
That and Blum stuff is awesome.
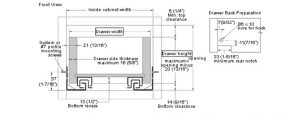
Once you get your drawer slides, you will get a set of instructions detailing how you need to make your drawers (similar to the image below). From there you will just need to follow the instructions and build your drawers to suit your drawer slides.
Just a note on building your drawer bottoms: if you’re using heavy enough material for the bottom of the drawer, you can probably pocket hole screw them in place. But if you’re using light material (like 1/4″ thick), you will have to rip a relief or dado along each of the inside faces of your drawer sides (see picture below). You can use either a router bit like these or a dado blade. You could setup a table saw and do it that way, but it might be difficult.
If you do have to cut a relief, remember to add the length of the relief to your drawer bottom when cutting it out to make sure that the material slides in and rests on the reliefs.
Once you’ve got your drawers made, you need to mount your drawer slides and install the drawer rails on to the bottom of the drawer boxes you just finished.
Follow the instructions for your particular drawer slides. During this step, it’s really helpful to have a number of clamps like these. These sorts of clamps are absolutely invaluable to have and if you’re doing any sort of woodworking, please save yourself a lot of frustration and buy some of them.
I also found this Kreg Cabinet Hardware Jig Kit to be a huge help, as it allowed me to clamp the drawer rails in the right place with minimal effort. And if you’re going to be building any sort of cupboards, you’re going to need some sort of Forstner bit and the jig in this kit makes boring holes for doors super easy. The hinge jig itself makes this kit well worth it.
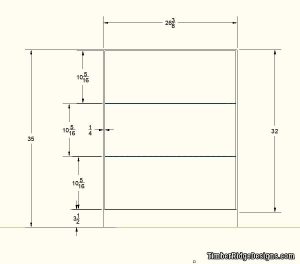
Once you’ve got your drawers made, you can layout and measure for your drawer faces just like in the picture below. I left about 1/4″ gap all around the cabinet in order to allow for some adjustment, and then i left about 1/8″+ gap between the drawer faces.
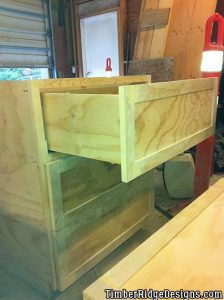
Once you’ve cut your drawer faces and made them to size, you just screw them in place going from the inside of the drawer into the back of your drawer face.
Install your drawers onto the drawer slide carriages and you’re done and ready for final finishing!
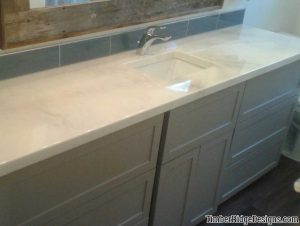
Once you’ve built your vanity, check our article on making a great diy vanity countertop here.

Leave a Reply