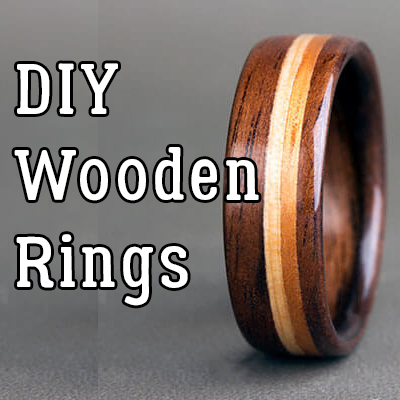
DIY Wooden Rings – How to Make a Wooden Ring At Home
A wooden ring makes a rustic yet regal accessory which makes a unique statement. And DIY wooden rings get you a personalized piece of jewelry that is truly your own. Handcrafted wooden rings are great options for those who are looking for eco-friendly, affordable accessories.
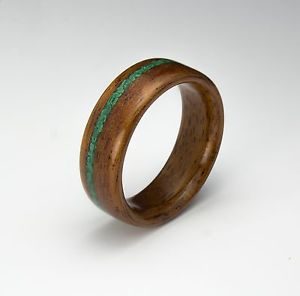
A wood ring stands out as being completely unique in a sea of commonly seen metals.
 As an even bigger bonus rings made of wood are hypoallergenic and ideal for those who have a metal allergy. With a ring made of wood, you never have to worry about the ring causing a rash or turning the finger green. Couples often choose handcrafted wooden wedding rings to make them personalized and unique. Wooden wedding rings can be made in matching design and the best thing is that both the rings are made of the same wood.
Those who do not want to wear something that feels like a piece of jewelry would find DIY wooden rings a great choice as they are light in weight and feel more comfortable to wear. Making your own customized ring out of wood is easy and takes only few dollars. Some of the links on this page are affiliate links and as an Amazon Associate I might earn a tiny amount from qualifying purchases if you end up buying something through one of them.
How To Make A Wooden Ring – A Guide To DIY Wood Rings
To create your own fashionable wooden rings, you just need a block of wood and some basic tools and supplies.
Choosing the Wood
The first step in making a DIY wood ring is selecting the right wood. You want the ring to be quite thin so choose a strong and dense wood. You can find some exotic wood billets with local wood suppliers and they would work perfectly for this project. These woods have some great features and are not at all expensive. Go for a darker color to get better resilience.
Cutting the Wood Blank
The next step is to cut a square wood blank which serves as the material for your wooden ring making project. Measure 3.5 cm from the wood’s end and draw a line along the width. This line is where you will cut your square blank for the ring. Now, using a circular saw or bandsaw, cut along the line. Make sure that you are cutting the wood across the grain otherwise the ring will be imperfect and can break. After cutting, you should have a flat square similar to a coaster.
Drilling the Hole
 Use a pencil or marker to scribble a bold, tiny dot at the center of the wood square. This is where you will place the drill tip to create the ring’s hole. The best tool is spade bit or wood bore. Get its diameter a little smaller than the finger width. Start by placing the wood widthwise in such a way that the dot you had marked faces upwards.
Now twist the dial or crank clockwise to tighten the clamps to ensure that the blank is held in place and you can focus on drilling. Next, place the tip of the bit on the dot and turn the drill on. Apply the modest amount of pressure and stop drilling when you have made a small hole with a shallow circle around it. Now, remove the blank from the clamp and flip it over. Re-secure the blank and check that the drill tip is in line with the hole. Repeat the drilling process from this side and guide the drill steadily until the hole is made through the other half.
Once you have drilled the hole, it is the time to use the Dremel tool. Insert its rotary head into the hole to smooth the surface which comes in contact with your finger. If you don’t have the tool available, you can use a folded sandpaper to touch it up. Make sure that the inner surface gets completely smooth without any edges or visible points that can scratch the skin.
Use your pencil or marker to free-hand a circular circumference about 2-3 mm bigger than the inside hole. The two circles together determine the thickness of the ring. Free-handing may not get a perfect circle but you will be sanding it into the right shape later on. Cut the corners around the edges using a bandsaw or circular saw.
Your blank will now have an octagonal shape. Now hold the outer edge of the wood blank against the belt sander or Dremel tool and smoothen out the edges. Keep rotating the blank slowly to ensure that the ring gets as even and symmetrical as possible. Use the circular outline as the reference to sand down the blank gradually. See that you shape the ring patiently.
Finishing the Ring
Once you get a satisfactory shape, tilt the ring at a 30-45 degree angle and press it into a Dremel or sander tool. Keep rotating the ring until the entire circumference has been sanded. Now turn it over and smoothen the other side. Here again, be careful and see that you don’t remove too much from any one edge. You can alternatively finish the ring by sanding with hand.
This gives you a better control over the amount of material you take off. The next step is optional. You can get a few passes of heat gun to impart additional durability and a better customized fit for the ring. To do this, set the ring on a heat-resistant surface and place the gun nozzle 15 cm above the ring. Guide the gun back and forth gradually until the wood begins to darken near the edges.
Finally, take a little amount of tung or walnut oil or beeswax in a cloth and rub the entire ring surface in and out. Oil coating will fill the pores of the wood naturally and give it a plastic-like consistency while allowing the natural grain and color to show. Give the finish some minutes to dry before trying the ring.
And it is the time to show off your handmade ring which complements your personality and shows your woodworking skills. The best part about DIY wooden rings is that you wear something that you have created yourself and feel pride whenever you see it. If you want some more information on the subject, you can check out our post DIY Wedding Ring – Your Guide to Groom of the Year.
Leave a Reply