Simple Homemade Dove Tail Jig Template – Do-It-Youself?
Before we dive into evaluating the feasibility of a simple homemade dove tail jig template, let’s cover some basic information on the joint itself. Also, some of the links on this page are affiliate links and as an Amazon Associate I earn a tiny amount from qualifying purchases. It’s literally a few cents.
The dovetail joint is very strong way to join the wood, because they do not lose their structural integrity when the wood naturally expands and contracts, dovetails are often used to assemble large parts, such as panel containing cabinets or chest cases. Dovetail joints usually have a high level of craftsmanship, as they require a lot of time and skill to function properly. The use of a cutter and a dovetail device can significantly reduce the amount of effort it takes to create a tight fitting joint.
The advantage of the dovetail joint is that it is the strongest of all joints, has a large adhesive surface, fits together, cannot be pulled apart, looks attractive and also holds together without glue. The disadvantage of the dovetail joints is that they are very difficult to mark and cut, and if they are poorly made, these joints lose the benefits listed above.
Dovetail joint types
Depending on the project, function and design, there are different types of dovetail joints. By creating the right type for your project, you can not only build strengths, but also demonstrate your skills and abilities. Here are the types of dove tail joints:
Through dovetails
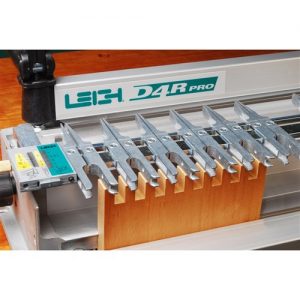
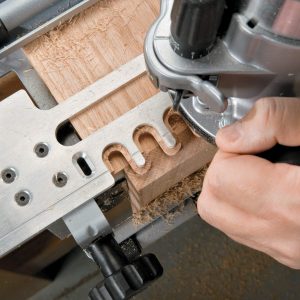
- The most basic dovetail joint, the through dovetail is incredibly strong and, if properly constructed, really a thing of beauty. Clean-cut dovetails have uniform, regular angles and no gaps between tails and during assembly. It requires patience and skill to make dovetail joints. Fortunately, modern technology has made the task much easier than the traditional method of hand cutting. With a router, and a dovetail jig, you can produce near perfect dovetails in just a few moments.
Half- blind dovetail joints
- Although the through dovetail is a classic assembly, in some cases you only want a portion of the dovetail to be shown. For example, a solid dresser drawer should not show the dovetail joint, but it is perfectly permitted on the sides of the box. Half-blind dovetail joints are perfect for such an example.
Sliding dovetail
- The sliding dovetail is a method of connecting two boards at right angles, with the intersection point in the area of one of the boards that is not at the end. This seal provides the engagement force of a dovetail. The dovetails are assembled by sliding the end into the socket. It is common to slightly shrink the socket so that it is somewhat firmer towards the back of the seal so that the two components can be easily pushed together, but the seal becomes narrower when the end position is reached. See wikipedia for more info.
Deciding which dovetail to choose for your project depends on factors such as function and design. With technological progress as it is today, woodworking has become much more accessible at a high level. Creating dumbbells by hand is a feat in itself. But we are now able to use special dovetail templates, cutters and routers to ensure that the joint can be perfectly shaped and reproduced infinitely many times. So, if you create special projects that require multiple generations, you can be sure that the dovetails will help them last a long time.
Materials used for a homemade dove tail joint
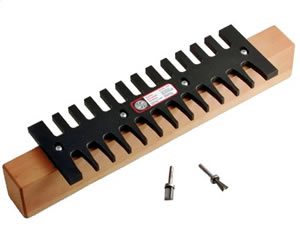
The dovetail clamping devices are almost always made from a metal base, have some form of clamping system, and use pressure rods and a comb (sometimes called a template) for cutting the dovetails. If you create your own template, you might be able to get away with not using a metal base but using standard 3/4″ hardwood instead. The pressure bars that hold the work piece to the template must be cut out of one and half inch hardwood, while the comb can be made from a quarter inch piece hardwood, or purchased ready made and attach to a homemade jig. Many dovetail templates have wing nuts or plastic buttons to tighten the wood in place. Hardwood cams provide considerable clamping force to keep your work piece stable.
Jig comb
The jig comb determines the size of a joint. Half inch dovetails are standard, while quarter inch dovetails are typically used on thinner woods or smaller pieces. Some templates are available with different comb models for greater versatility. Cutting your own quarter inch hardwood dovetail comb can be a tedious and lengthy process, which requires you to spend a lot of time refining the template to achieve the accuracy you want – all notches should be completely identical in width and the ends of each tooth should be rounded in a perfectly uniform manner. Many hardware stores sell plastic or metal dovetail combs that you can install on a home-made template.
Attaching wing nuts to bolt lock washers is less expensive and more complicated than cutting lugs into hardwood, but screw threads are a lot easier to strip and harder to tighten but they are quicker to loosen. The stencil printing bars must also be very strong so that they do not bend or deform under pressure. If you’re making your own, I recommend cutting two 1 ½ inch by 1 ½ inch hardwood bars to build an extra strong pressure bar.
Page Content Navigation
Simple Homemade Dove Tail Jig Template Do-It-Youself?
There are a couple of simple homemade dove tail jig templates that you can make.
One is for use on a table saw, and the other is made for cutting dovetails by hand and both are designed for through dovetails.
In my searching I only found a couple of sources for plans, and they all charged for the plans. It wasn’t much – around $10-$20 for the plans, but after looking through them and realizing the amount of time, effort and materials involved I just can’t justify spending the time and effort on building something that I could buy for a couple hundred dollars.
Can you do it? Sure.
But for the time, effort and frustration spent on ensuring you make the parts precise enough in order to work properly I don’t think it’s worth it.
I would have to say that unless you have a lot of spare time and feel that the joy and pride of making your own tool outweighs the cost of buying one, I would HIGHLY recommend you don’t bother.
Save the money you were going to spend on digital plans to build one and put it towards buying an actual jig.
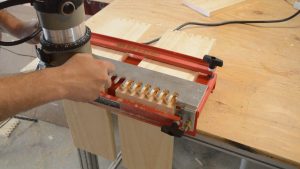
Homemade Router Dovetail Jig

As a dovetail joint requires a high amount of precision, you may end up needing to get different parts machined up so they fit together properly, and between the cost of this and your time to design the parts it could end up costing you about the same as if you went out and bought the jig.
So that being the case, we recommend the following jigs:
1) The General Tools 861 Pro Jig. It’s a basic jig that can get you up and running without much expense.
2) The Porter Cable 4216 Jig. It’s a super versatile jig that will get you cutting accurate dovetails in no time.
3) Leigh Super 12″. Leigh is the top-end company when it comes to jigs. Known for precision and durability, this company always tops the list.
Once you’ve got your jig, you can read our post on building dovetail drawers here for an overview of the process with a few tips to keep in mind.
Homemade Table Saw Dove Tail Jig
The homemade table saw dove tail jigs were all based on a sled design where you clamp your pin or tail board vertically and run them through the saw blade using the jig.
And while these plans were a lot more simple to make than the router dovetail jig, I still can’t recommend spending the time on it when you can just buy a router & dovetail jig and start making some joints.
With all us creative types, I’ve found it’s really easy to add additional projects to a main project in an effort to save money.
And while you might save a bit of money, more often than not the additional side projects only serve to distract and delay your original project.
Just like in this case – if the original project is to make some dovetail drawers and then you add making a dovetail jig into the mix (which you have to then successfully complete BEFORE you can start the drawers), you are making your life a lot more complicated in the process.
I’ve found this is usually how projects get started and then not finished – because rather than just paying and moving on you allow yourself to be sidetracked with additional projects in an attempt to save a couple bucks.
And at the end of the day, the cost savings is not worth it.


Leave a Reply