Epoxy Coating For Wood – A DIY Guide To Clear Casting Epoxy Resin For Wood
It is fascinating to see the different creative options available when using an epoxy coating for wood and epoxy resin for wood.
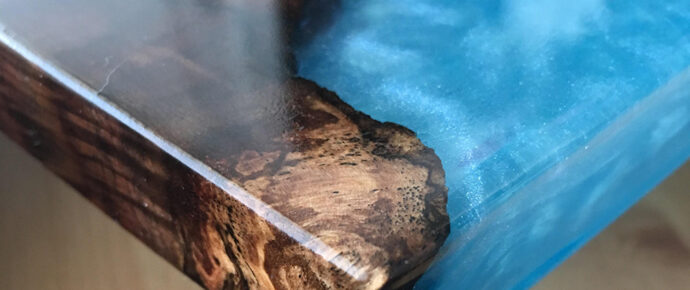
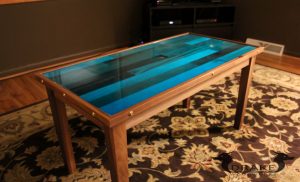
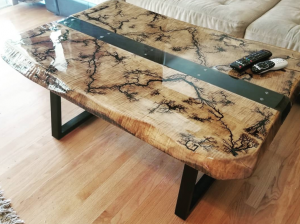
From embedding sea shell and pennies, to incorporating live edge wood and LED lighting, the options available when you’re clear casting epoxy resin for wood are virtually unlimited.
In this article we cover a few quick hacks to help you get started on your next amazing DIY project. 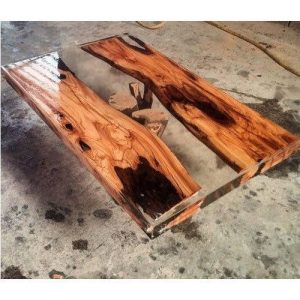
Epoxy coating can be used to attach decorative items to your wood projects and adding a layer of coating protects the creative ideas. The applications of epoxy coating have increased as it is easier to work on flat surfaces. Today, people use it on floors, wooden surfaces, counter tops, masterpieces and treasures for protection and decoration.
Today, we provide a complete DIY guide to using epoxy coating on wooden surfaces.
Page Content Navigation
How Epoxies Work
Epoxy coatings are essentially thermosetting polymers which come in two parts – an epoxy resin and a hardener. When equal parts of both these parts are catalyzed, a very hard finish with high resistance to water, scratches, solvents and chemicals is produced.
The secret to achieving a thoroughly catalyzed coating is a mix of good surface preparation, mixing the ingredients as per the instructions and an acceptable and feasible working environment. If you are able to control the process, you can control the result.
Upon mixing the epoxy resin and hardener together, an exothermic chemical reaction starts. In this process, the mixture undergoes a transformation and cures from liquid to gel and then solid. Curing process takes some time. It depends on a number of factors including the ambient temperature, type of hardener, amount of heat generated and the temperature of the substrate. The major of these factors is heat. The hotter the epoxy is, faster is the curing process.
You can even help cure and remove any air bubbles from the pour by using a torch – just make sure you don’t burn it. Some of the links on this page are affiliate links and as an Amazon Associate I might earn a tiny amount from qualifying purchases if you end up buying something through one of them.
The First Step For Using an Epoxy Coating for Wood – Surface Preparation
 To achieve good adhesion, you should take into consideration a variety of factors. The first requirement is that the surface should be clean and dry. It should contain some roughness to let the resin adhere to the substrate. Any existing oil, grease, waxes and other contaminants should be cleaned off before sanding. To make sure that the substrate is dry before applying the epoxy, you can use a heat gun to heat the surface. Once the substrate is dry and clean, you can sand the surface using a sandpaper or aluminum oxide. Wooden surfaces should be sanded using 80-grit sandpaper as the coarse grit roughens up the surface and gives tooth for a good finish. Oily woods like teak can be wiped down with acetone prior to epoxy coating in order to get rid of any oils.
Remove the dust using a brush or vacuum cleaner. Wipe off the surface with a lint-free cotton cloth damped with solvent. Don’t touch the surface after cleaning to feel the smoothness. This can contaminate the surface with oils from your hands and prevent good adhesion of epoxy. The working environment plays a vital role in the quality of the epoxy coating. It is advisable to choose a dust-free, dry environment to get better results. The temperature of the wood, workplace and the epoxy should all be similar.
Staining
Epoxies can be applied over stained wood. The best way to make sure that the resin is compatible with the stained substrate is to test the application. Though there are types of stains available for wooden projects, the best recommended are oil-based aniline dyes. Whatever you use to stain the wooden surface, the stain or dye should be completely dry before you starting coating the surface with epoxy. Once you epoxy the project, you cannot stain the wooden surface.
Pouring Epoxy Coating – Using an Epoxy Clear Coat for Wood
To make sure that the epoxy doesn’t spill over the edge of the project, you can create a dam around the surface perimeter. Tack a temporary molding along the edge to do this. Before pouring the epoxy, ensure that the tabletop or surface you are coating is uniform and level.
Refer to the instructions on the product to estimate the quantity of materials required to complete your project. Mix the epoxy resin and the hardener thoroughly and start pouring the mixture in the center of the surface in a zig-zag or spiral pattern for even distribution of the epoxy. You may require repeating the pouring process until the epoxy runs together. It should continue leveling for few minutes after the pour.
The mixture remains in the liquid form for quite some time that allows you to work with it. You can rework the material to achieve the desired thickness before the epoxy thickens and begins to take gel form. Once the mixture moves towards the gel stage, it becomes firm like rubber and the epoxy is no longer tacky.
Once the mixture is spread on the surface and begins leveling, bubbles will start appearing on the epoxy. It is essential to remove these air bubbles by heating the mixture using a torch or heat gun. Spread the heat over the whole surface with whatever you use. Air bubbles rise up on the surface and pop as you use the torch or heat gun.
When the epoxy is in the gel stage, it is possible to apply a second coat without having to sand the surface. You can do this up to 72 hours after coating after it has achieved a soft set. If another coating is applied during this stage, it bonds chemically with the first one.
In order to get great results, you have to start from the beginning and make sure you’re using a top-quality epoxy. So be sure you’re using a quality product like the ones listed here.
Finishing Up Epoxy Resin for Wood By Wet Sanding
Some epoxies develop amine blush on the surface when coated on wood. Though this blush goes away by washing the surface with water, wet sanding is often recommended and useful. You should perform sanding within 24 hours after the curing and before 48 hours when the epoxy becomes very hard.
And you’re done! The epoxy coating process for wood is not so easy and you can expect things to get good after some practice. So, get some practice rounds and then finish your favorite wood project to showcase your creativity and decorate your place with a DIY epoxy coating.
For more tricks on using epoxy resin, see our article The Best Epoxy Resins For Tabletops – Food Grade Epoxy here.
Or if you’re looking to make your own epoxy countertops just follow the link to our in-depth DIY article for epoxy resin for wood.
Leave a Reply